Configure CAT rig control
Radio Bench uses Hamlib to control supported transceivers. CAT can synchronize frequency and mode, report meters, control PTT, and send CW text.
Check the transceiver
Radio Bench controls any transceiver with a Hamlib backend. Check the Hamlib supported radios list for your model before you buy a cable.
The available operations depend on the radio and its backend. A backend can support frequency and mode but not PTT, CW text, or meters.
An Icom IC-7300 is the reference transceiver for the Radio Bench documentation and screenshots.
Prepare the transceiver
Connect the radio control cable and install any driver that the cable requires. Close other programs that use the same serial port.
Set the radio CAT baud rate and address when the model requires them. Record those values before you configure Radio Bench.
Connection settings
MODEL— the Hamlib rig model.PORT— the serial port that the control cable provides.BAUD— 1200 to 115200. The default is 115200.DATA BITS,STOP BITS,PARITY, andHANDSHAKE— match the radio CAT menu.AUTO CONNECT— connects the rig during startup.
Connect
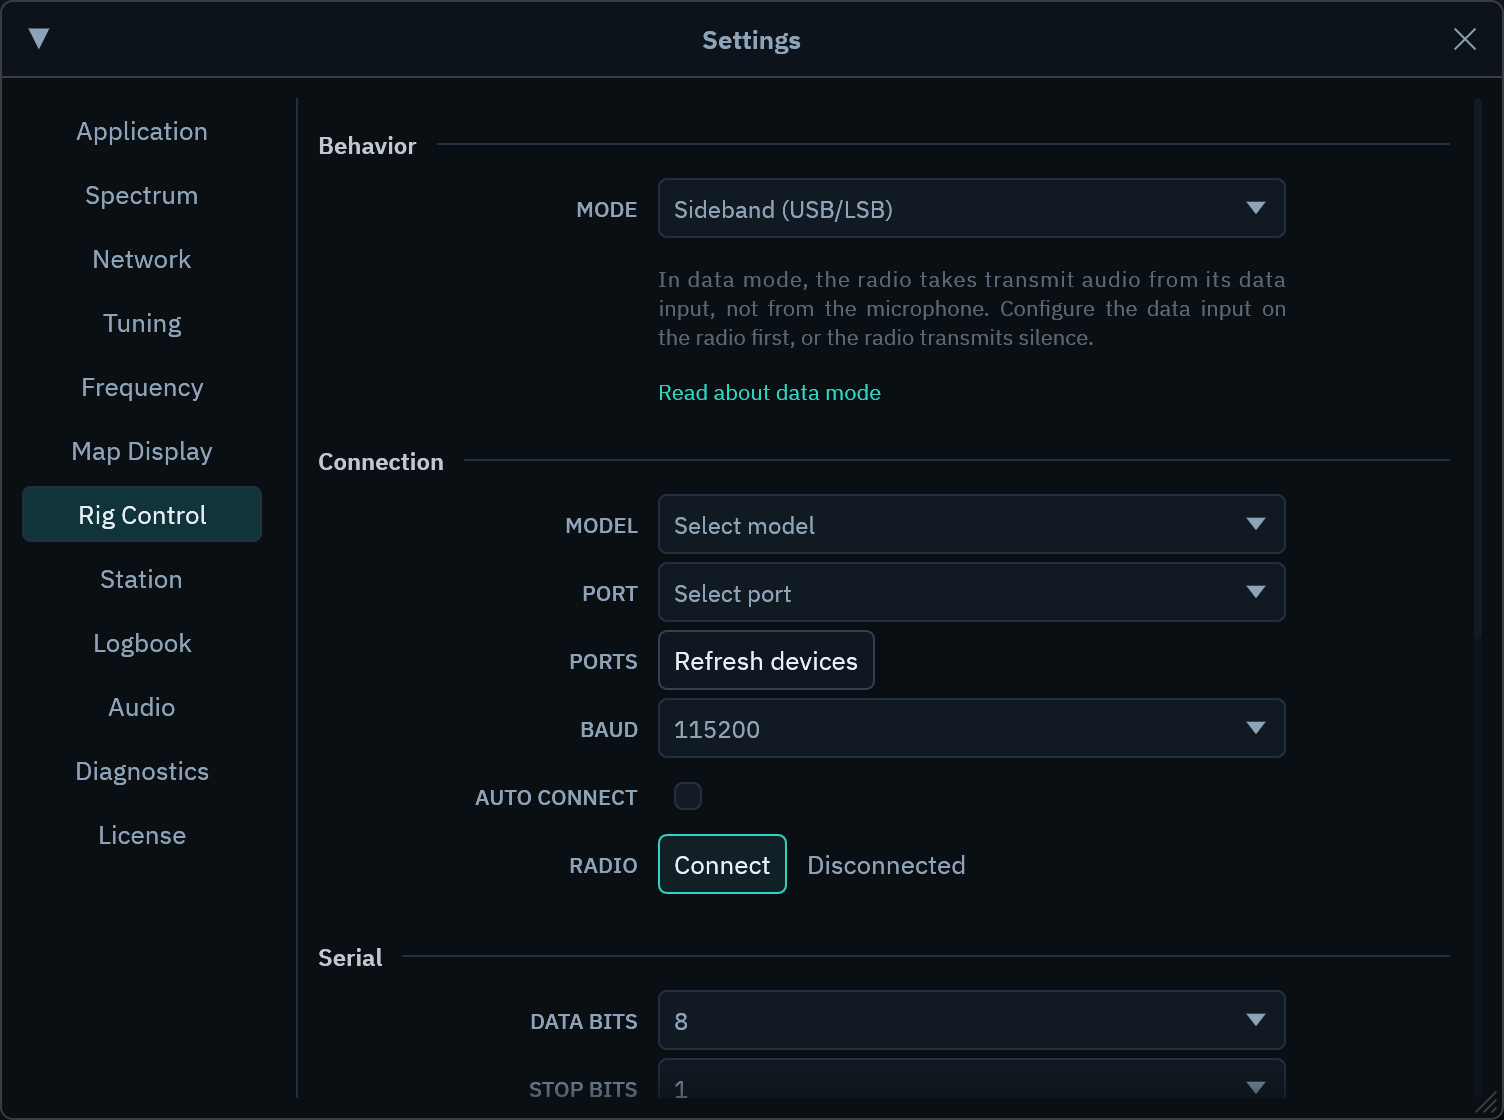
- Open
Settings>Rig Control. - Select the Hamlib rig model.
- Select the serial port and communication settings.
- Select
Connect.
The rig readout updates after a successful connection. Radio Bench makes only one automatic connection attempt during startup.
Meters
The top bar shows the meters that the connected radio reports. Radio Bench can show VOLT, PWR, SWR, ALC, ID, and TEMP.
A meter that the radio does not report stays blank. Transmit meters update only while the radio transmits.
Respond to a failure
A connection warning provides an Open Rig Control action. Expand the technical details when support needs the original Hamlib message.
A frequency, mode, or PTT command failure disconnects CAT. A failed CW text command reports an error without disconnecting the rig.
Avoid tuning loops
The rig readout in the top bar has a Track and Fixed toggle. Track follows the rig frequency, and Fixed leaves the Radio Bench VFO independent.
Choose the behavior that matches your station. Confirm which device controls tuning before you operate transmit features.
Set the rig mode preference
The Behavior section of Settings > Rig Control has a MODE dropdown. It controls which mode Radio Bench requests when CAT synchronizes the rig.
| Preference | What Radio Bench sends | Consequence |
|---|---|---|
Do not change mode |
Frequency only. It does not send a mode when it tunes. | The radio keeps its current mode. |
Sideband (USB/LSB) |
The plain mode that matches the receiver, such as USB, LSB, CW, AM, or FM. This is the default. | With Track selected, choosing it applies immediately and moves a radio out of data mode. |
Data mode (USB-D/LSB-D) |
The data variant of USB or LSB. CW, AM, and FM keep their own modes. | The radio takes transmit audio from its data input. Configure that input first, or the radio transmits silence. A radio without data mode reports a command failure and CAT disconnects. |
Sending CW text is an exception to all three settings. Radio Bench always switches the radio to CW before it sends the text.
For RADE V1, Radio Bench uses the lower sideband below 10 MHz and the upper sideband at 10 MHz and above.
Each manufacturer gives the data mode and the data input a different name. See the radio manual for the exact menu names.
Radio Bench sends the mode preference only while the rig readout toggle shows Track. With Fixed selected, Radio Bench does not change the radio frequency or mode. Radio Bench also disables the MODE dropdown.
When you change the preference with a rig connected and Track selected, Radio Bench applies it immediately.
A tracked retune keeps a data mode that you set on the radio yourself, if the request stays on the same sideband. A retune to the other sideband, or to another mode, replaces it. The rig readout reports a data mode as its own mode, not as the plain sideband.